For 2004-06 4.8is
Part I: Remove Front Bumper
Part II: Headlight Removal
Part II: Change Xenon Bulb
Tools:
3/8" Drive Ratchet
3/8" Drive Extension
10mm 6 pt Socket
5/16" 6 pt Socket
Flathead Screwdriver
Tiny/Mini-Flathead Screwdriver
T20 Torx Screwdriver or Socket
Phillips Head Screwdriver (not pictured)
 Reference: 2004+ BMW X5 Front Bumper Removal Instructions PDF
NOTE:
Reference: 2004+ BMW X5 Front Bumper Removal Instructions PDF
NOTE: You can change the bulb without removing the headlights completely or the bumper. Just do all of Part II (especially moving the accessories on the driver side headlight) and slide the headlights forward as much as possible. With the headlight washers you won't be able to completely remove the headlights. However, this should give you enough room to do all of part III below. Just be careful not to drop any screws. Use paper, bubble gum, whatever works for you to keep the screw and/or the socket from falling.
Part I: Front Bumper Removal
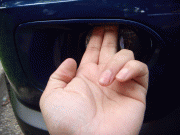
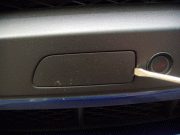
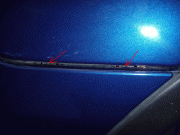
a) Remove the Foglight trim cover by grabbing it from behind the top and pulling down, then out towards you. Feel for the notch where to grab. It will just pull out. Do this for the other side too.
b) Remove the Tow eye flaps by using a flathead screwdriver to gently pry open the flaps.
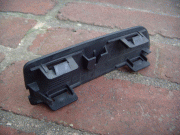
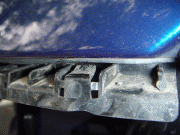
c) Use the 5/16" socket to remove the two screws in the front wheel wells. Then use a flathead screw driver to lift out the wheel arch finishers.
d) Use the 10mm socket and remove the bolts/screws at the Tow eyes and at the foglights. Also, remove and disconnect the foglights at this time. Use a Phillips head screwdriver to remove the two screws underneath the foglight then just pull it out. Unclip it from the wiring harness.
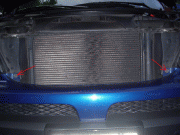
e) Use the 10mm socket to remove the screw on each side of the bottom grid/grill. Use the 5/16" socket to remove the five screws at the bottom of the front bumper.
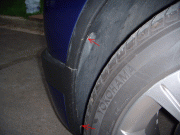
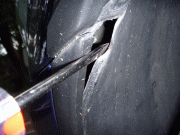
f) Go to the side of the bumper, where it meets the fender, and pull down and out a little bit. This will expose two clips that hold the sides on. Use a tiny jeweler's flathead screwdriver, or something similar, and use it to push down on the clips to release the bumper. You should hear a click when you push down on it. Once released you should just be able to pull the side of the bumper out towards you. Do this on the other side too.
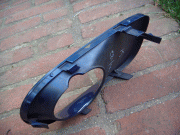
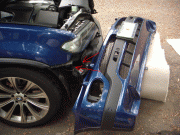
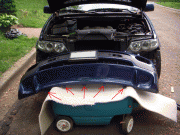
g) Position something to lay the bumper on (I used a plastic wagon with carpet). This way you don't have to disconnect the hose for the washers. You can disconnect or twist off the wiring harness from the body in the corner to have more freedom. Be careful not to damage the five lower bumper attach points. You can also just lay the bumper in the same orientation it came off but sitting on the lip just underneath the license bracket - so that way the attach points are suspended and not touching anything. Obviously, make sure whatever you use doesn't move! So, just remove the last two screws on top of the bumper using the 5/16" socket (you have to open the hood). There, the bumper is off!
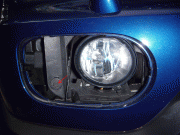
 Part II: Headlight Removal
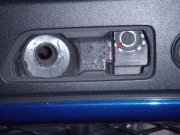
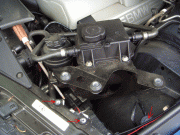
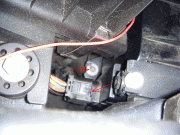
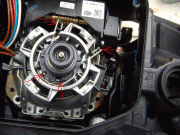
a) Remove 3 screws holding the accessories. This will allow you to move it out of the way and give you easier access. I used a file to hold it in the pic but normally I use a piece of 2x4. You can also disconnect a wire (underneath) if you want to move it even further away.
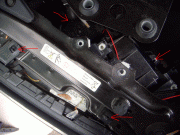
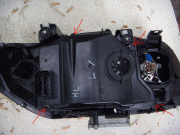
b) Remove four screws holding each headlight. 2 are on top of each headlight. The other two: behind in the back and another directly beside where the angel eye bulb cap is. You should now be able to slide the headlights forward to make it easier to diconnect the harness behind each headlight. Simply slide the headlights out towards the front to remove them. Headlights removed!
 Part III: Xenon Bulb Replacement
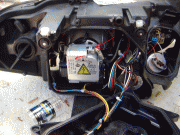
a) Remove the four back cover T20 screws.
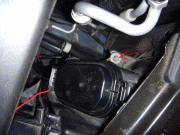
b) With the cover off, remove the wire to the igniter then turn the igniter (silver box) counterclockwise to release it. Just pull it towards you to remove it.
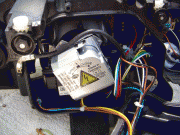
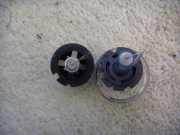
c) Pinch the two wire holders together to release the xenon bulb. Take note of the notches on the bulb. Don't worry the bulb will only go on one way. Once released just pull it out towards you to remove. Insert the new bulb and re-assemble!
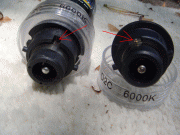
Comparison of the OEM D2S bulb vs. $28 pair of 6000K D2C bulbs. Yes, they cost me $28 (incl. shipping) off ebay. You can see that there's a slight difference in the notch (OE has a metal contact) and the D2C has a bluer glass when looking at the bulb head-on. I'll see how long they last (rated 3000 hrs I believe). Brightness seems just slightly less than stock in well lit areas. However, in extreme darkness they SEEM brighter (just an illusion of course). They match my 6000K fogs perfectly.