|
Subframe Bushing Replacement DIY
Subframe Bushing Replacement, by the numbers...
The rear end of the e53 is attached to the body of the vehicle using four rubber and metal bushings. The subframe bushings are a wear item, but not something that needs to be replaced often; how often depends a lot on the vehicle and how it's driven. I bought mine with ~150,000 miles on it, and didn't find anything in the records from the previous owner that showed they had been replaced before. When test driving the vehicle prior to purchasing it, I knew they needed to be replaced; the rear end made a horrid clunk when launching from a stop and shifting in the lower gears. The previous owner had a quote from the independent mechanic he used, and decided to sell rather than put another $1,200 into it. Doing the job myself saved much of that; I spent roughly $140 on the bushings, and another $300 on the tool (but you can rent my tool for $50 instead!)
The job isn't terribly difficult at all; probably a 3 on a scale of 1-10. If you line up all your parts & tools ahead of time, plan on the job taking about 4 hours from start to finish. You'll want to work on a flat space, preferably paved, with some decent light.
- The first step, of course, is to order your bushings. Stock bushings are part number 33316770454 and can be sourced through your dealer or many online retailers. Ask around for recommendations. Some opt for PowerFlex urethane bushings, which can be installed without using the special tool (refer to X5girl's excellent DIY thread for specifics), but getting the old stock bushings out is by far the toughest part of the job. There are alternatives to using the removal tool, but the tool is the easier way by far.
- Next step is to gather your tools. [shameless_plug]Renting the Baum Tools e53 Rear Axle Carrier Subframe Bushing R&R tool from me will help immensely with this job.[/shameless_plug] I'm not out to become a rental magnate or anything -- not giving up my day job any time soon -- I'm mostly offering the rentals to give you all the opportunity to use this quality tool without having to spend a pile of cash on buying your own. It would also be cool to recoup the cost of the tool... Good thing I'm a patient guy.

Aside from that tool, you'll need the following: a ratchet with a 3" extension, and 14mm & 21mm sockets (a 9/16" and a 7/8" will do in a pinch,)
a length of steel pipe and/or a deep-well socket assortment and a longer extension bar (6", 9" or 12") to fit it (for bending the muffler bracket out of the way,)
a pry bar,
a block of wood, 2x4 or similar,
some means of safely raising & supporting the rear of the vehicle -- a lift or a floor jack with two jack stands,
a propane torch and/or an electric heat gun
a torque wrench.
- If you're using stock bushings, place them in your freezer at least overnight before starting the job, preferably longer. The bushings are a tight fit in the subframe, and reducing their temperature will reduce their diameter slightly, which in theory makes the job of inserting them a little easier.
- The night before tackling the job, spray some penetrating oil on the nuts & studs holding the rubber muffler mount to the subframe bushing stoppers, just ahead of each muffler. If you live in a rust-prone area (or even if you don't), this will help those nuts to come off without incident, and reduce the chance that you'll need to replace part number 33316770458 after twisting the stud inside the stopper (ask me how I know this to be true. ) This stopper is easily accessible with the wheels on the ground, so no need to jack it up yet.
When you're ready to tackle the job...
- Raise the rear wheels of the car off the ground;
a. It should go without saying that you need to be safe about this stuff; use an appropriately-sized lift or floor jack, or even the jack in the trunk, then support the car properly using jackstands. If you don't take the time to do any of this and your X5 decides to sit on your lap, don't come to me complaining; if you're working on your car, this stuff should be second-nature. Granted, you're not doing a lot of crawling around under the car when doing this job -- you'll be sitting on the ground beside the X5 for much of it -- but I'd still hate to have the corner of a 2+ ton vehicle come down on any part of me. Losing limbs or dying is not a desirable outcome.
b. I found that for this job, it's best to raise both wheels together, especially if you're doing all four bushings in one sitting. If you raise only one, the subframe can become cocked to the front or back and make the job of bolting the subframe back to the body a bit difficult.

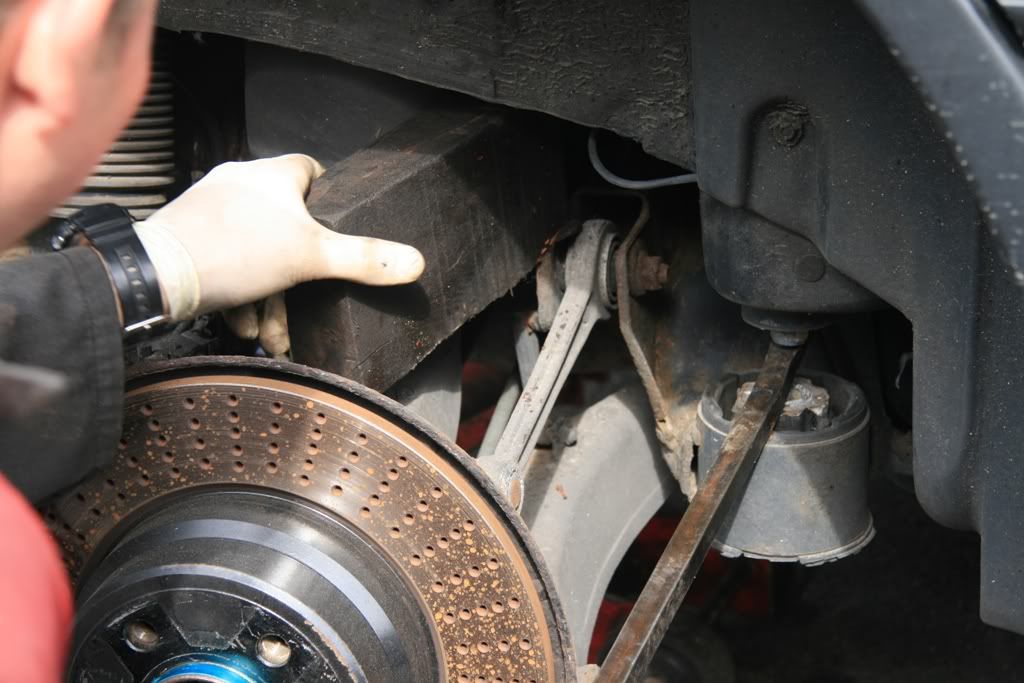
- Remove the rear wheel from one side of the vehicle.
- Use a 14mm socket to remove the collar nuts (#9 below) that fasten the muffler hanger bracket (#7 or 8 below) to the subframe bushing stopper (#4 above); a 3" extension helps to get past the muffler hanger. Then remove the muffler hanger bracket from the muffler support. The hanger is made of rubber, and is just friction-fit to the muffler support; remove by twisting & pulling.

- Use a pry bar, deep socket with an extension, large pliers, or whatever you have to bend the forward muffler support out of the way so that the area just below the bushing is clear. The support is made of steel rod, about 1/4" thick, and will bend with some force. I had pretty good success using a deep socket with a 12" extension on it along with a pry bar. Having an extra set of hands helps immensely too. The alternative is to remove the rear exhaust; very unnecessary if you can just bend the brackets out of the way.
It's said that heating the muffler support with a propane torch makes it easier to bend; bending the brackets cold isn't terribly difficult, so I'm not sure this helps or not, but others have suggested it so there's probably some merit to the idea. It might also reduce the possibility of breaking the hangers. [/INDENT]
- Using a 21mm (or 13/16") socket, remove the bolts (#6) and the subframe bushing stoppers (#3/#4) from the bottom of the subframe on the side of the vehicle you're working on.
- When the bolts come out out, the subframe will likely drop down a bit -- the shock absorber will keep it from going too far -- allowing you to remove the top stoppers (#5) from the two corners of the subframe. If your bushings are as badly deteriorated as mine were, the cast aluminum center portion of the bushing may drop out to the ground.
- At this point you may want some extra clearance above the bushing; use a pry bar to lever the subframe down slightly and insert a wood block between it and the body.
(photo 'borrowed' from x5girl
If you want even more working space, remove the lower bolt holding the shock absorber to the wheel carrier. It's a good idea to place a jack under the wheel carrier so that it doesn't drop down too far. (thanks to theblue for that tip!)
 
- Place the small follower plate (#2) on top of the old bushing.
- Push the threaded rod (#5) up through the bushing & follower plate, then thread the small nut (#6) on the top of the rod.
- Apply a small amount of grease to the threads on the rod; this will help protect the threads and make turning the nut a bit easier on your arm. I used some white lithium grease, but whatever you have on hand should work, as would a heavy oil. Anything is better for the threads and your arm than nothing.
- With the legs of the bridge (#1) pointing upward, slide the center part of the bridge onto the rod from the bottom.
- Slide the thrust bearing (#7) onto the rod and thread the large nut (#8) on below it.
- The two feet of the bridge need to be placed where there are two voids in the bushing's lip and the subframe "can" is exposed. The feet of the bridge need to be snugged up tightly against the sides of the bushing to keep it from popping off; the inside of the feet are curved to match the radius of the bushing, but there's very little footing for it.
- Adjust the spread of the legs on the bridge to get a good fit, then thread the large nut up against the bottom of the bridge by hand to help hold it in place. Once it's snugged up a bit, and while holding the legs in place, use the knurled knob on the bridge to snug the legs against the bushing.
- Use a heat gun or a propane torch to apply heat to the outside of the subframe can; the bushings have a rubber coating on the outside, which over time develops a tight bond with the painted metal surface on the inside of the subframe can. Heating it up helps release the grip of the bushing on the metal subframe.
Be cautious about where the heat is applied; there are many cables and aluminum parts in the vicinity that could be damaged by too much heat. The Bentley manual suggests a safety threshold of 176°F (80°C); if you start to blister the paint on the side of the subframe, that's probably too hot.
- Using the 15/16" ratcheting combination wrench (included in the kit), slowly tighten the large nut against the bridge.
Pay close attention to the feet of the bridge as pressure is applied, to ensure they don't slip off the edge of the subframe can. This can damage the subframe and the tool.
- Keep tightening the large nut, and before long you should see a gap begin to appear between the lip of the bushing and the subframe... You're almost there!
- As the bushing is drawn out, it should take less and less effort to turn the nut on the tool; keep a hand under the assembly so you can catch the bushing and the tool when the bushing reaches the point of falling out; there's nothing else there to hold it in place once it clears the subframe.

- Once the bushing is out, use a wire brush and a rag to clean up the subframe a little, then place the large round piece (#4) on top of the subframe can. Run the threaded rod up through the center of it, thread the small nut on top, then slide the bushing onto the rod with the medium follower plate under it, and the thrust bearing & large nut under the follower plate. Thread the nut up the rod so the bushing is closer to the subframe, and put a little lubricant on the outside of the bushing -- I used an alcohol-based hand sanitizer, as has been recommended by others because it's decently slippery and evaporates quickly.
Make sure the bushing is aligned properly; the voids need to be in pretty much the same position as they were before, and with the arrows on the bottom of the bushing pointing to the front & back of the car (that's where I screwed up in the video). The Bentley manual says the maximum deviation is 7°; doesn't have to be perfect, but close.

- Use the 15/16" ratcheting combination wrench to slowly tighten the large nut against the follower plate. Once it's snug, double-check the alignment of the bushing in the subframe and double-check that the plate on top of the subframe is still in place, then continue cranking on the nut until the bushing is fully seated.
- Disassemble the bushing insertion tool, remove it from the subframe, then repeat steps 6 through 18 for the next bushing on that side.
- When done with the second bushing, it's time to put it all back together:
a. Place the top stopper (#5) on top of the subframe bushing,
b. Reinsert one of the long bolts (#6) through the bottom stopper (#3 or 4), then through new subframe bushing and top stopper.
c. Using a pry bar, jack, helper, or whatever you have at your disposal, realign the bolt with the threaded hole in the body, and spin the bolt by hand a few threads to keep everything in place.
- Repeat the steps above for the other subframe bushing, then tighten the bolts on both bushings until the subframe is drawn up to the body.
- The torque spec for those bolts is 94 ft-lbs (163Nm).
- Bend the muffler bracket back to where it was before using the same tools you used to bend it out of the way.
- Reinstall the muffler mount onto the muffler bracket, then onto the rear subframe stopper's studs and tighten to 22 ft-lbs (30Nm).
- Reinstall the wheel and lug bolts, and tighten the bolts to 103 ft-lbs (140Nm).
And you're done with that side!
After you've finished dancing, it's time for the second set of bushings; repeat steps 2 through 27 on the other side of the vehicle, and when you get back to this point, you're done!
Time to crack open one of these (my favorite!), or whatever your favorite beverage happens to be. Pat yourself on the back, and congratulate yourself on saving several hundred dollars over what the dealer would have charged you for the job. 

__________________
2001 X5 Sport 3.0/5-speed
1998 318ti/5-speed
1988 735i/5-speed
1984 528e/5-speed (soon to be M20B25-powered 525i!)
|