
|
|
|
|
||||||||||
| Xoutpost server transfer and maintenance is occurring.... |
| Xoutpost is currently undergoing a planned server migration.... stay tuned for new developments.... sincerely, the management |
 |
|
|
LinkBack | Thread Tools | Display Modes |
|
#1
 11-05-2016, 04:37 PM
|
|||
|
|||
|
E53 driver's door lock actuator motor repair
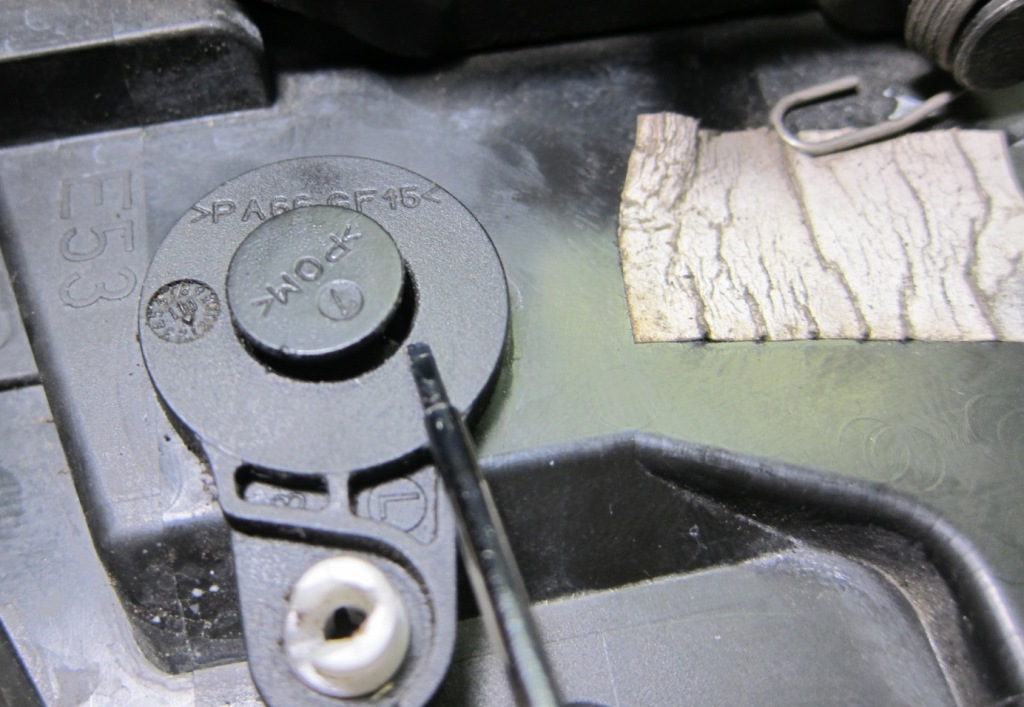
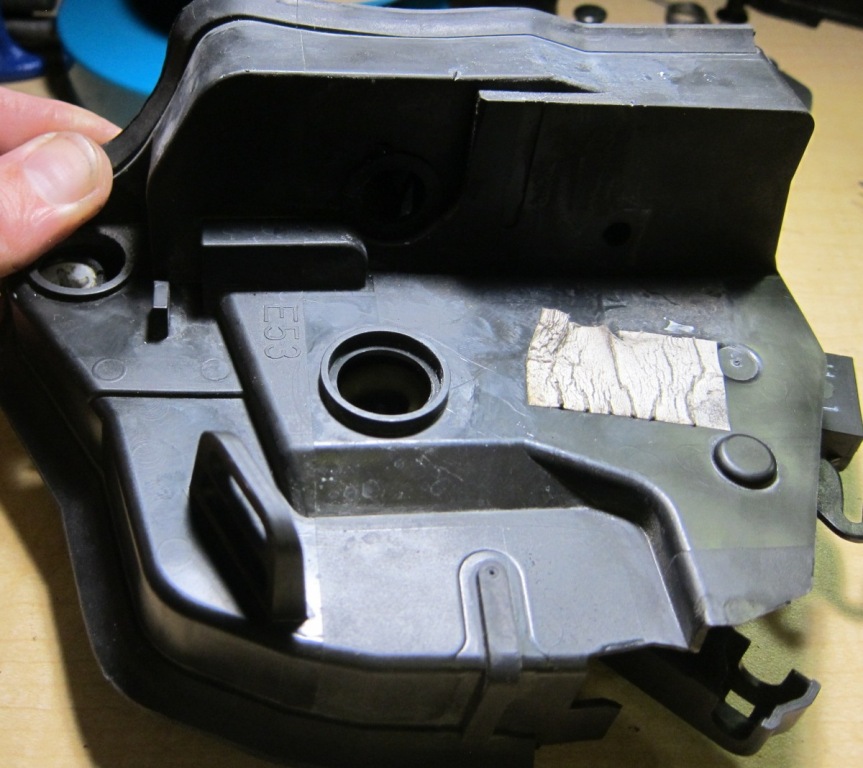
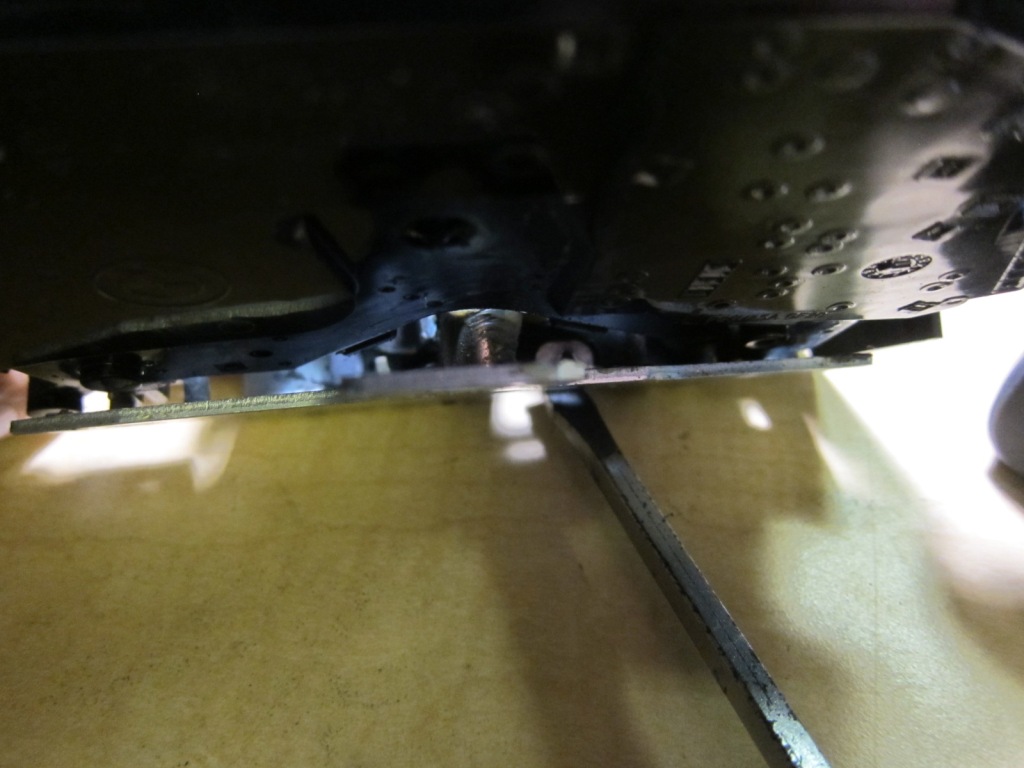
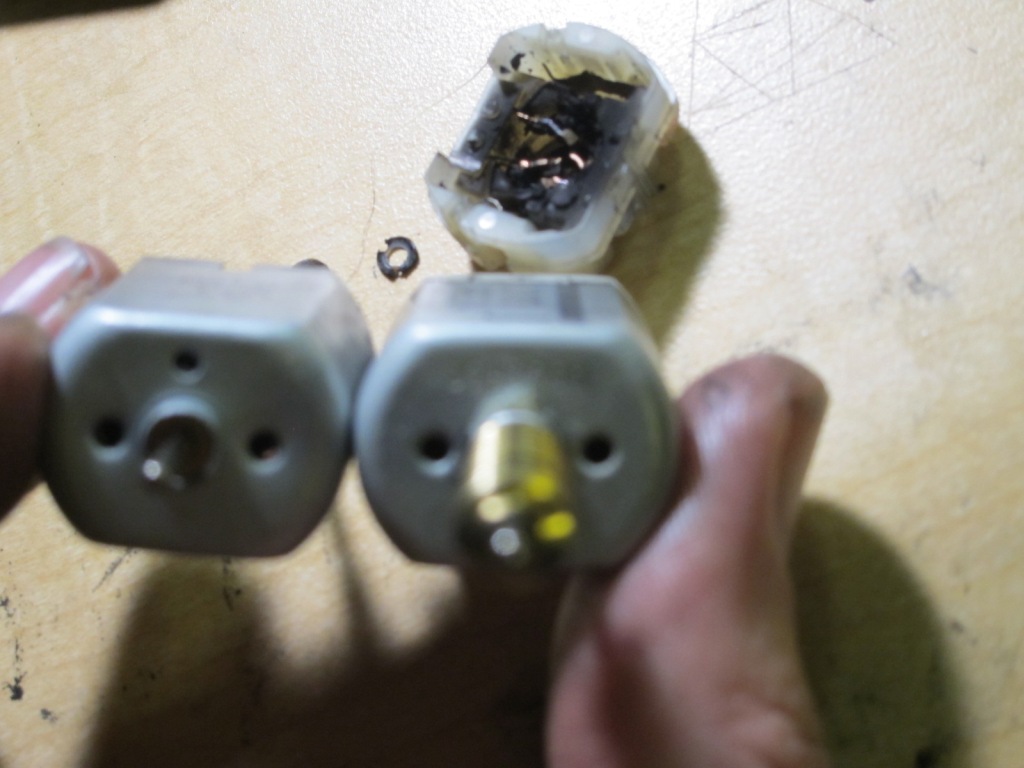
No problems encountered that could not be solved. Symptoms - had been finding weakness in the driver's door lock actuator for many months. Repaired it before it died. Usual failure mode would be for the motor to open half way, requiring further attempts of manual override. Locking was fine; unlocking was flaky and weak. Followed instructions in the Bentley to remove the actuator assembly. Those instructions do not say you need to remove the door lock, but you do. After removing the door lock and cleaning/inspecting it, I noticed a crack in one of the cast parts. The door lock works by key just fine for now, but I bought a rebuild kit from regulatorfix.com, and rebuilt it, replacing only that failed part - reusing the remaining existing parts. Removal of the door lock only is pretty trivial. Most people will opt to just replace the door lock actuator assembly, which makes it a pretty easy job. But I knew it was just the unlock motor inside the assembly that had failed. I also came across a reference (maybe for an E39) to a Mabuchi FC-280PC-22125 motor that I already had in stock, since when I replaced door lock motors in my Honda I bought a few spares. So I figured I'd take it apart and fix it. The actuator assembly is not meant to be taken apart, so some drilling is required, along with planning to reassemble with screws in the drill holes. So be careful with drill bit size and quality and placement and depth. It's a pretty complex mechanism so I took many photos throughout the disassembly, which proved invaluable when putting it all back. After getting it all the way open, there are two motors. The (only) failure point was the brushes on one of the two motors (Johnson brand) inside the actuator. The second motor and everything else appeared to be in excellent condition. Second motor could have been new, it looked and tested so good (smooth, strong, tight, clean). I assume the failed motor was for unlocking (which was weak and flaky) and the good motor is for locking (working great). There are no loose wires in the actuator - there is a circuit board embedded into the plastic, carrying conductors from the ~8-pin connector to the two 2-pin connectors that the motors directly plug into. Really slick. 2 motors, one is Johnson, on left side. One is Mabuchi, on right side (in photos). The motors (not including the shafts) _appear_ (externally, but they are not) identical between those two and also identical to the brand new Mabuchi FC-280PC-22125 (NOT FC-280SA) motors I had saved as spares from repairing Honda door actuators. The worm gears are different between the two. The two motors turn in opposite directions when voltage is applied. The Johnson turns in the same direction as the Mabuchi replacement. So the existing Mabuchi turns in the opposite direction as the new Mabuchi. Applying 12V on the bench, the Johnson motor tested weakly, was susceptible to shaft position, and was clearly failed/failing. Popping off the plastic cap showed the brushes almost gone, everything caked in carbon, etc. This is absolutely the failure point. The old Mabuchi motor seemed perfect, so it was put back, basically untouched other than testing and blowing air through it, without opening it up. Since the worm gear and extended shaft on the Johnson motor seemed they would be very difficult to transplant to the new motor, I decided to instead transplant the brushes end of the motor from the new Mabuchi to the old Johnson. I left the worm gear, shaft, steel housing, armature in place. Transplanted from the new Mabuchi to the old Johnson: plastic cap containing brushes and electrical connections, red plastic ring at inner end of slip ring, white plastic rings at outer end of slip ring. There seemed to be a short in there too, so I found and removed some caked carbon that was in between the two halves of the slip rings, shorting them together. After cleaning that out with a utility knife blade, it ran very strongly. Not as smooth as the old Mabuchi, but plenty of power. I then carefully reassembled. Like a jigsaw puzzle / rubiks cube at points. This was all made a lot easier from having taken photos at each step of the way, so I could go back in order to know the re-assembly sequence. To reassemble the items that had to be drilled apart, I cut threads and tapped in screws. In general, I left all the grease untouched. It was fairly clean, other than the grease. The whole thing was pretty amazing and in good shape except for that one failure point. Works like new now. Pics follow.
__________________
2001 X5 3.0i, 203k miles, AT, owned since 2014 Last edited by oldskewel; 11-08-2016 at 01:34 AM. 
|
| Sponsored Links | |
|
|
|
|
#2
11-08-2016, 12:38 AM
|
|||
|
|||
|
Here are the pics, in order of disassembly. They are supposed to be self explantory. For example, if there is a pile of 4 screws shown next to the actuator, that indicates that those screws were just removed, and their positions are obvious.

__________________
2001 X5 3.0i, 203k miles, AT, owned since 2014 Last edited by oldskewel; 11-08-2016 at 01:36 AM.
|
|
#6
11-08-2016, 03:19 AM
|
||||
|
||||
|
Solid work. It's always nice when you can repair something instead of just replacing it. I always feel guilty throwing away good parts because of a simple failure, it's so wasteful.
__________________
03 3.0i mt 89 325is
|
|
#7
11-08-2016, 03:17 PM
|
|||
|
|||
|
Thanks. I feel the same way, and I always like a challenge.
I could have gone either way on this repair, but knowing I already had two spare Mabuchi motors in hand made me decide to give this a shot. It was still uncertain until the very end though, since I had found no reports of this on the E53, and mostly failure reports on other BMWs.
__________________
2001 X5 3.0i, 203k miles, AT, owned since 2014
|
|
#8
05-13-2017, 10:15 AM
|
||||
|
||||
|
Great deconstruction of the component!
Those motors look remarkably similar to the power mirror motors  Mike
__________________
 Mike Dallas, TX & Appleton, WI 2003 E53 4.4i Pearl Beige 2003 E46 330Xi Monaco Blue 2007 E90 335Xi Black Sapphire Metallic 2011 F25 X3 28i Black Sapphire Metallic
|
|
#9
05-13-2017, 12:11 PM
|
|||
|
|||
|
Quote:
In my experience the least-fun part of fixing things is the time and effort in between figuring out what part you need and tracking it down and getting it, so I don't mind buying stuff "just in case." And that goes 10x for tools, BTW.  For example, this thread, yesterday: https://xoutpost.com/bmw-sav-forums/...-nut-bolt.html
__________________
2001 X5 3.0i, 203k miles, AT, owned since 2014
|
|
| Bookmarks |
|
|
|
|


 Linear Mode


