
|
|
|
|
||||||||||
| Xoutpost server transfer and maintenance is occurring.... |
| Xoutpost is currently undergoing a planned server migration.... stay tuned for new developments.... sincerely, the management |
 |
|
|
LinkBack | Thread Tools | Display Modes |
|
#1
 07-24-2011, 01:27 AM
|
||||
|
||||
|
Holy Gawd- Under ride protection install
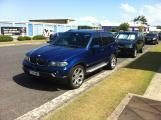
This was NOT a walk in the park. Maybe if the parts showed up with the brackets installed, this would have made some sense, but the under ride protection DIY is something that will have you venturing back to your toolbox for everything from a good sized hex nut driver to a pneumatic cutting wheel or Dremel.  It should NOT be taken lightly as a DIY- not without instructions at least. "You might want to have a friend help"? Yeah right. I have known six people who are not professionals that could pull this install off alone. We were left to figure out which brackets were for the front and which were for the rear mounts. We had zero idea what bolts went where- leaving our own sense of style within German engineering as our guide. Six of these, eight of those.... Clearly, since we got it installed, this was far from impossible. But with no instructions and no solid DIY, we were adrift in a myriad of engineering possibilities. Guess what else no one tells you? Order 'front bumper support brackets' 51 11 7 116 667 and 51 11 7 116 668. These don't HAVE to be replaced, but if you can remove the front bumper without snapping at least one of the connections, then you've done this more than once. Even the instructions we downloaded said to replace them. Order them with the kit. My local dealer had exactly ZERO of each side.  Anyway, here's the finished install. It was a PITA. I saw many threads on here looking fro advice with some folks suggesting that the poster should 'ask the dealer.' ") Ask me. I can help. Ask me. I can help.   Finally, I will say that I was surprised. This install tightened up the front frame flex in a way I have felt only with a strut bar install.Granted, it makes sense that added rigidity from the sudden connection *below the strut towers* and *directly on the frame* *would* make a difference, I did not exoect the change. It was a nice surprise. Made my 4.8is fell a little closer to my trusty old 3.0. Some observations: R/R of anything normally accessed from under the car (not oil changes), like alternator, belts, etc will require removal of this unit. If you do not DIY, you might expect an extra hour on your bill for otherwise routine maintenance or fixes from your mechanic. I fully expect to find an extra hour tacked on to my bill for R/R of this beast. It is STURDY. It's heavy. I am sure it will do the job- if correctly mounted- for any off road X5. I ran off the interstate (at SPEED) in my 3.0 and didn't need this kind of protection to get out. I have to imagine though that this thing might've sent me skating over my share of obstacles if I needed it to survive. Finally, oddly, I will add that this unit *decreases* the clearance of the X5. It adds a good 1.5-2.0" to the depth of the undercarriage. This was most evident less than two hours after the install when I scraped the under ride protection on a high parking spot curb. I would never have noticed it before the install and yet there it is.
__________________
 
Last edited by PropellerHead; 07-24-2011 at 09:11 AM. 
|
| Sponsored Links | |
|
|
|
|
#2
07-24-2011, 02:56 AM
|
||||
|
||||
|
Wow! That is one heck of an ordeal to install what would seem to be a relatively simple part. Seeing the whole front end off shows what the time involved. Good job!
__________________

|
|
#3
07-24-2011, 09:28 AM
|
||||
|
||||
|
Thanks! The bumper must be removed to fit the bracket for the front mounts of the unit. I have attached a pic here of the bracket highlighted. Next to the bracket (on the left side) is the alternator air duct. The brake ducts for both sides must also be removed and replaced after install of the mounting brackets.
The factory under ride protection- a small bar that runs across the underside of the radiator- will be removed. This unit uses the same bolts on the body to mount. They are not long enough to clear both brackets. Our instructions said nothing about this. Here's a tip: Mount the units front tabs BEHIND (to the rear of the car) the newly installed front brackets. If you mount it in front, the rear mounts will be looking for that 1/4" of clearance to mate properly.  Here's a pic of the parts- including the brackets: 
__________________
Last edited by PropellerHead; 07-24-2011 at 09:43 AM.
|
|
#4
07-24-2011, 10:11 PM
|
||||
|
||||
|
with out wanting to sound rude, why would you bother!!!
|
|
#5
07-25-2011, 12:41 AM
|
||||
|
||||
|
Quote:
 My motivations changed as the consideration of this purchase evolved into a delivery and installation. My motivations changed as the consideration of this purchase evolved into a delivery and installation.First, if the E53 follows my experience from the E39, some of those little chassis-specific items will find themselves constrained, then EOL, then GONE.  I have found myself wishing for a few things on my E39 that are gone forever- even though I have done most of them over the past 10 years. I didn't want to find myself in 7 years having had the opportunity to purchase this, wanting it, and being unable to find it. I kept my last E53 for 7 years and it started with almost 3x the 11K miles this one had. I expect a long life of maintenance, repair, and upkeep with this one. (watch it get totaled tomorrow! I have found myself wishing for a few things on my E39 that are gone forever- even though I have done most of them over the past 10 years. I didn't want to find myself in 7 years having had the opportunity to purchase this, wanting it, and being unable to find it. I kept my last E53 for 7 years and it started with almost 3x the 11K miles this one had. I expect a long life of maintenance, repair, and upkeep with this one. (watch it get totaled tomorrow!  ) )Secondly, I kinda like the pics I have seen of it. I haven't ever seen even ONE around here with the under ride protection. I see a BUNCH of LeMans Blue X5's online- especially 4.8is'- but only a few have the under ride- I wanted something OE that would make my ride a bit more unique. This fills that bill nicely. Then, I found one. I could divert some funds from our 'don't ask don't tell' fund- the fund which is in ZERO danger of being repealed around here- and make the purchase for delivery when I was to be in my home office. You should have heard how PO'ed she was when the huge and heavy box with running boards showed up with me 1500 miles away. Yikes.  By the time it shipped, it was too late. I *had* to put it on. Now, the install was *supposed* to be easy. From what I read, it was 'find a friend bc it's heavy.' 'A few hours to install.' 'Easy.' I should have been cautioned by the lack of an online DIY.  I found some pdf instructions from BMW on parts that appeared similar to mine. None matched the part #'s. None had the same parts my kit did. I found some pdf instructions from BMW on parts that appeared similar to mine. None matched the part #'s. None had the same parts my kit did.With the car on ramps, I was sorta toying with not doing the DIY. By the time the bumper was off, I was fully committed. We were gonna do this and get it done. We still thought the rear/underside mounting was going to be easy.  . It was probably the hardest to figure out! . It was probably the hardest to figure out! With the front bumper cover back on and the stock bits removed or cut for clearance, we lie on our backs under the car for 45 minutes. When we figured out the mounts and brackets, we were renewed and could see daylight. By the time the final and most goofy step actually WORKED- fishing the 4 threaded brackets through the hollow frame to mate with bolts from the unit- We were so surprised and enthused that we couldn't stand not seeing it through. The kit even includes this coat hanger like thing to fish the brackets. It has to be one of the weirdest things I have used on a car that I didn't make for myself. I was 45 minutes late to a good friends' birthday dinner, but as a car guy, he totally understood. He had wanted to come over to help! Now, having driven it, I can say that I have noticed and really like the added rigidity of the front chassis. While not as drastic, it feels similar to a strut bar or to the larger sway bars I did on the E39. It's not AS complete a transformation, but that improved tactile response is the closest similar experience I can think of. Well. Maybe the front bushing R/R on my 1975 2002. I remember that difference and it was 20 years ago. But even fewer people could relate to that experience than new sways. So, sorry for the long post. The next install probably would only take 1/2 the time, so maybe the replies about the ease of it were filtered by experienced installers. And that's fine. Now that I am one, I can agree that it's not too bad once you know how it goes. But to say that any ole Joe can figure this out with no instructions and no experience in less than 1/2 a day is just not my experience. Was it worth it? The $ cost? No. The trouble? Well, wrenching is good for the soul. We had fun and experienced victory. Hard to put a price on that. I can say that I'd be happy to help a friend who has never done it. That would be more fun- and easier. But then, so few have X5's and even fewer still will have the chance to buy this thing. So it will have to be worth it for what it was: A hard fought battle of man over machine.
__________________
|
|
#6
07-25-2011, 01:23 AM
|
||||
|
||||
|
gotcha, sometimes you have just got to do it, for my previous car i saw a chrome / stainless bezel that fitted around the gauges on the instrument cluster, and had to have it, it was fairly easy to fit and once fitted was very discreet, but i my family wondered why
hehe
|
|
#7
07-25-2011, 03:55 AM
|
||||
|
||||
|
Thanks for the tips sir. Subscribing in hopes that one appears on my doorstep here soon.
Did you happen to take a shot or two of the brace before fitting it?
__________________
Previously owned: '03 4.6iS Dinan Supercharged
|
|
#8
07-25-2011, 09:36 AM
|
||||
|
||||
|
Quote:
It's pretty. The only real bright chrome part was the front. The rest is brushed. If anybody sees the brushed portion, it's you, your mechanic, or the guy you just ran over. General bumper/install tips:
Other thoughts on the unit:
__________________
|
|
#9
07-25-2011, 09:42 AM
|
||||
|
||||
|
Quote:
My wife saw the test mount of the unit- with the chrome bar where it would be. She gave me *that* face, "You're not ADDING that are you? Why?" Note that she didn't ask how much it was. We have strict rules: I don't ask about dresses and shoes. She doesn't ask about car parts. This is why wrenching is good for the soul. Men gotta have at least one legal, completely moral thing that they do and can tell their wives about- but still can't explain.
__________________
Last edited by PropellerHead; 07-25-2011 at 09:52 AM.
|
|
#10
07-25-2011, 04:11 PM
|
||||
|
||||
 Welcome to the exclusive underride protection club! Yes, they are very rare and are becoming hard to find. I had only seen them in photographs until I bought mine... Lucky for me, mine showed up when my wife was out of town. She noticed it while we were having breakfast one Saturday morning at a sidewalk cafe' across the street from where the X5 was parked.... Did I mention that she has 114 pairs of shoes?
__________________
 2010 X5M Active Autowerks tune 22" BBS SV in Titanium Gunmetal Black grills
|
|
| Bookmarks |
|
|
|
|


 Linear Mode


