
|
|
|
|
||||||||||
| Xoutpost server transfer and maintenance is occurring.... |
| Xoutpost is currently undergoing a planned server migration.... stay tuned for new developments.... sincerely, the management |
 |
|
|
LinkBack | Thread Tools | Display Modes |
|
#1
 07-30-2013, 09:22 PM
|
||||
|
||||
|
Steering Tilt Motor shaft replacement DIY
In any case, I could not find much documentation for replacing the tilt motor shaft that broke so I hope this helps someone else down the road. The symptom was that I could hear the motor whirring when the driver door was opened and of course the tilt lever would not do anything but make the same noise when actuated. If neither your tilt or telescoping functions nor your driver seat memory or adjustments, the problem is likely the control module that is built into the driver seat. Do a search for help with that problem. Here is what I remember by memory so as usual, don't take this for more than basic guidance. Take your X5 to a qualified technician/repair shop if you feel uncomfortable with the procedure. You will be messing with panels that go above your legs that could impair your driving if not properly secured, so be very careful and consider yourself WARNED!! Specimen 2001 X5 4.4 Sport Part(s): 32-31-6-760-684 ordered from pelican parts for $20.50 and took ~3 weeks to arrive Procedure: 1. First, removed the black plastic panel that covers the area above the brake/gas pedals. It is help by a plastic clip and at least three philips screws. 2. Remove the dash panel adjacent to it by removing at least 5 philips screws. It is held in place by screws adjacent to the steering column and other screws that will be exposed once the black pedal cover i step 1 is removed. 2b. It is possible that the next cover may not need to be removed, but it certainly helped see the shaft easier and confirm the problem shaft. There are some great instructions that can be used for this part on a post made by birck6: http://www.xoutpost.com/bmw-sav-foru...ry-issues.html 3. Just behind the steering wheel on the column itself there is a black plastic cover made of two halves. The top half has a screw on top that is a black plastic philips screw. Remove it carefully and without too much downforce because this the type of plastic screw that gets pushed into place, rather than screwed into place (once you jump into the procedure, you will see what I mean). 4. Then remove a real torx screw holding the bottom half of the covers using either a t-20 or t-25 torq bit. It is fairly long so keep going until it is removed. 5. Once both screws are out, you will break the two halves apart by prying in opposite directions. Don't do it too forcefully as you may break the clips that keep them together. Once taken apart, the top half will be set aside since it is connected to the flexible vinyl cover that keeps thing covered up as you move the steering in/out. 6. Once you have removed the two lower covers and the steering column cover, you should see something like this: 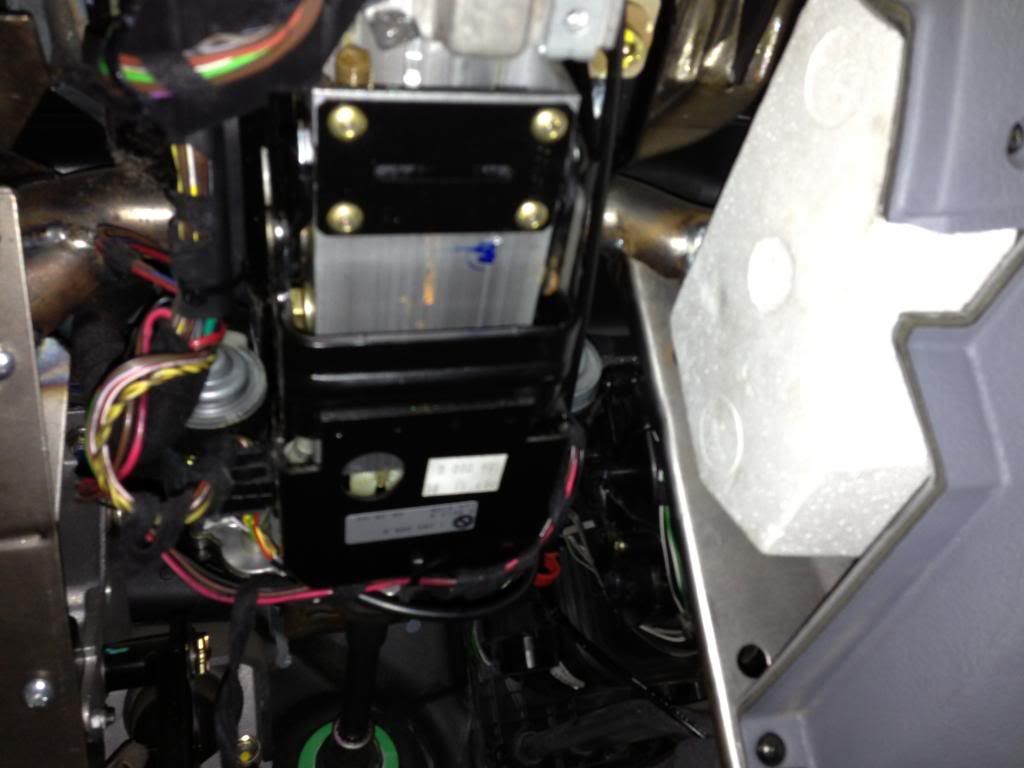 7. The shaft for tilt is on the right hand side of the steering column and is visible with a flashlight. The motor is the shiny cylinder with the black tape on it next to the next to the white shaft. Attached to the motor is a small gearbox which gets one end of the shaft inserted into it.  8. The shaft itself is made of three parts, the inner metal shaft with square ends, the nylon (white) cover, and a small nylon cap that covers one end of the shaft. The entire thing is very flexible as seen in this demonstration  9. What you need to do is bend the shaft and cover in such a way that the ends pull out of their respective sockets. What I found was the the bottom of the metal shaft broke and left the fragment of shaft in the motor socket. The nylon cap also took some pliers to wiggle off but was relatively easy. THIS IS THE PART THAT TOOK THE LONGEST TO FIGURE OUT, BUT IS VERY SIMPLY TO FIX. After removing the large piece, I simply pushed the broken fragment out with a piece of wire from the back side of the motor gearing. The socket where the end of the shaft pushes into is a thru-hole. This a picture from the back side of the motor that shows the gearbox attached to the tilt motor. Sorry for the blurry picture. 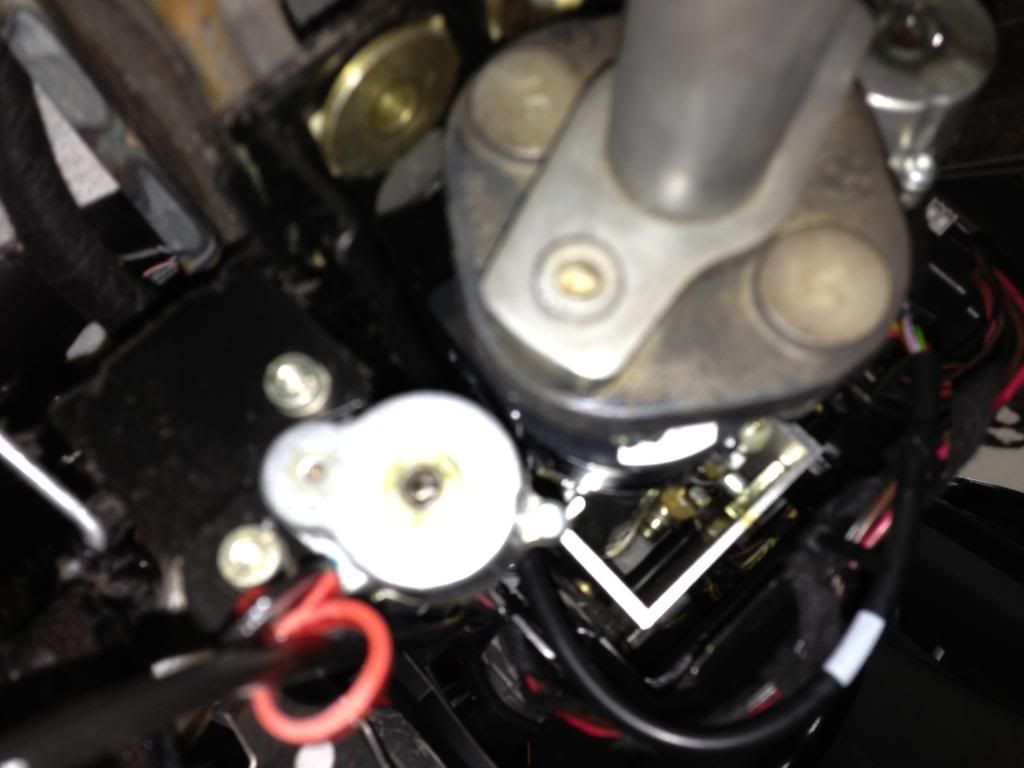 10. Once you get the fragment out, bend the new shaft as you did to remove the old one and feed both the top and bottom ends into the sockets. This will take some wiggling to get them in place. I had to pull on the tilt lever slightly to turn the gearbox in order to pop the shaft in place. You will know that the shaft is in place correctly if the shaft is straight. If it has a bowed "U" shape to it, it is not in place correctly. Here is a picture of my broken shaft including the fragment I pushed out of the gearbox.  11. Once the shaft is in place, push the white nylon cap at the bottom end of the shaft over the gearbox. There is a slot in the cover that goes over a metal key that keeps it from spinning. 12. test the tilt which should be functional now. 13. Replace all of the covers in revers order and make sure you tighten and re-use all of the screws/clips. You don't want any of them coming off at any speed while you are driving. 14. All in all about a 30minute to 1 hour job if you know what you are doing. Enjoy your tilt function again and roll the dice to see what breaks next.  I am sure someone will chime in that I should have replaced the telescoping shaft too while I was in there, but if I replaced everything I knew would break in this car, I would run out of money. To be fair, it may be worth replacing the ignition switch at the same time since i had to do it about a year ago due to electrical gremlins. 
|
| Sponsored Links | |
|
|
|
|
| Bookmarks |
| Tags |
| diy, e53, steering, tilt, tilt shaft |
|
|
|
|


 Linear Mode


